An E-Ink Recipe Frame with Inkplate 10
iot The Inkplate 10 is an awesome, hackable e-ink display. It’s a 9.7” display with a resolution of 1200x825. It’s also a dev board, with an ESP32, SD card slot, and LiPo battery connector. I was first inspired to pick one up when I saw these projects with a newspaper-like read out on the front page of Hacker News. Recently I thought of a more practical use for the Inkplate that i’d want to use almost daily - a digital, dynamic recipe book.
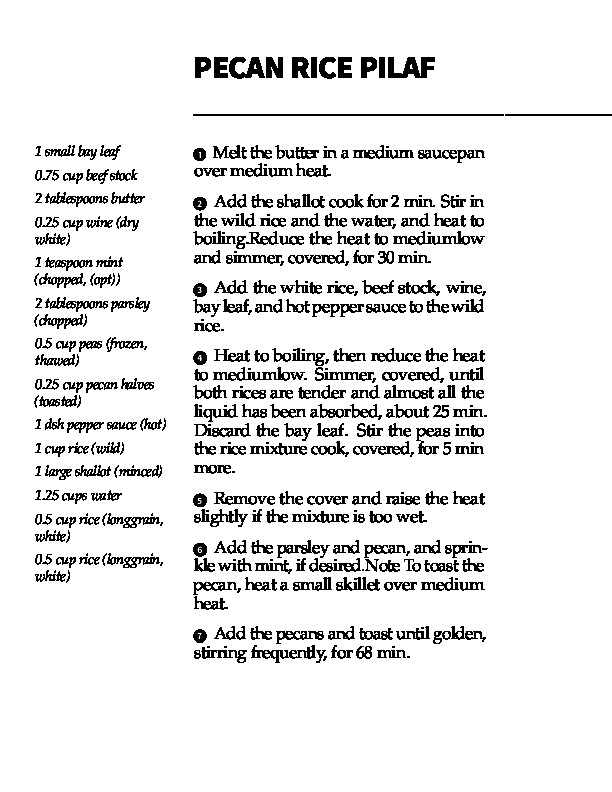
Recipes are quickly generated with data from Spoonacular, parsed into LaTeX, then a PDF (to handle all the typesetting), and finally a JPG that the Inkplate can render! Let’s take a closer look at the process…
Generating the Recipe
Pull my pre-built Docker image
ghcr.io/joshspicer/einkto try it yourself! The source code for the project is also on GitHub.
I’m using the Spoonacular API to generate the recipe. It’s a great service with a generous free tier. I’m using the Recipe Search endpoint to find a recipe based on a query. The query is a string that can be anything from a single ingredient to a full recipe name. For example, “chicken” will return a list of recipes that contain chicken (although I have it hardcoded to vegetarian recipes only!). A query like “chicken soup” will return a list of recipes that contain chicken and soup. “chicken noodle soup” will return a list of recipes that contain chicken, noodle, and soup. You get the idea.
The Spoonacular response looks something like this, which then needs to be parsed and typeset into something presentable.
If you pull my docker image and set a SPOONACULAR_API API key in an .env file, you can generate a typeset recipe image with the following curl:
$ docker run --rm --name eink --env-file .env -p 3000:3000 eink
$ curl -X PATCH \
    -d '{\"mealQuery\": \"strawberry\"}' \
    http://localhost:3000/update?mode=recipe

Accepted # Or 'Bad Request/Internal Server Error'. Check your logs with 'docker logs eink'
Internally the tool is retrieving data in the following way:
There’s a ton of Spoonacular functionality i’m not taking advantage of here - like generating a meal plan, generating a shopping list, and filtering recipes based on very specific dietary and/or macro-nutrient requirements.
RECIPE=$(curl "https://api.spoonacular.com/recipes/complexSearch?query=$QUERY&diet=vegetarian&addRecipeInformation=true&fillIngredients=true&number=1" -H "x-api-key: $SPOONACULAR_API" | jq '.results[0]')
Parsing the Recipe
The parsing is done in a bash script and is not for the faint of heart. Ultimately, the script takes the JSON response from Spoonacular and convert it into lines of LaTeX.
# ... snip ...

# Replace pointers
sed -i "s/$RECIPE_TITLE/$title/g" /output/template.tex
sed -i "s/$INGREDIENT_POINTER/$I_LATEX/g" /output/template.tex
sed -i "s/$METHOD_POINTER/$M_LATEX/g" /output/template.tex
Typesetting the Recipe
At the end of the previous routine, we ended with a template.tex file where markers in the template file, like %%%INGREDIENT_POINTER%%% were replaced with the parsed recipe:
\begin{recipeingredients}
\ingredient{0.5 oz almond }
\ingredient{0.25 cup kiwi }
\ingredient{0.5 cup milk  (organic)}
\ingredient{0.5 cup greek yogurt  (plain)}
\ingredient{0.25 cup raspberries }
\ingredient{1 cup strawberries  (frozen)}
\end{recipeingredients}
The LaTeX template utilized here is called ‘Jacopo Recipe’ by vel. The template is bundled in the provided Docker image.
The next step is to typeset the LaTeX into a PDF. The bulk of this project’s Dockerfile size is dedicated to installing the necessary LaTeX packages to typeset and compile the document into a PDF.
pdflatex -interaction=nonstopmode /output/template.tex
The ImageMagick project is then used to convert the PDF into various file formats, namely BMP (if using the native Inkplate drawImage() function) and JPG (if using the esphome approach i’ll outline below).
# Jpg

convert /output/template.pdf -quality 100 /output/output.jpg  # Native resolution
convert /output/output.jpg -resize "${INKPLATE_WIDTH}x${INKPLATE_HEIGHT}" /output/resized.jpg  # Resize to Inkplate's dimensions
cp /output/resized.jpg "${BASE_DESINATION_PATH}/image.jpg"

# Bmp

convert /output/template.pdf  -quality 100 -depth 1 /output/output.bmp
cp /output/output_5.bmp "${BASE_DESINATION_PATH}/image.bmp"
Both image.jpg and image.bmp are then available as static assets served by the project’s node server. Go ahead, navigate to http://localhost:3000/image.jpg and you’ll see the recipe JPG in your browser!
Rendering on the Inkplate
A. Uploading sketch
There’s a few ways i’ve tossed around pushing the generated recipes to the Inkplate. My first solution can be run standalone by flashing this sketch to the device. The downloadAndshowImage() will download the image from whatever URL you provide it and then deep sleeps (although the deep sleep is a bit finicky).
bool downloadAndShowImage()
{
    // Craft bitmap URL
    char bitmapUrl[100];
    sprintf(bitmapUrl, "%s/image.bmp", baseAddress);

    // Draw the first image from web.
    // Monochromatic bitmap with 1 bit depth. Images like this load quickest.
    // NOTE: Both drawImage methods allow for an optional fifth "invert" parameter. Setting this parameter to true
    // will flip all colors on the image, making black white and white black. This may be necessary when exporting
    // bitmaps from certain softwares. Forth parameter will dither the image.
    if (!display.drawImage(bitmapUrl, 0, 0, false, false))
    {
        // If is something failed (wrong filename or wrong bitmap format), write error message on the screen.
        // REMEMBER! You can only use Windows Bitmap file with color depth of 1, 4, 8 or 24 bits with no compression!
        return false;
    }
    display.display();
    return true;
}
B. Esphome
The second approach - if you have Home Assistant running - is to flash the device with esphome, adopt it through the Home Assistant UI, and build with the Inkplate component. This method relies on OTA updates to update the embedded recipe image.
The YAML you’ll want to flash to your device is similar to:
esphome:
  name: inkplate

esp32:
  board: esp-wrover-kit

logger:

wifi:
  ssid: !secret wifi_ssid
  password: !secret wifi_password
  ap: {}

captive_portal:

ota:

# Enable Home Assistant API
api:
  encryption:
    key: "..."

i2c:

mcp23017:
  - id: mcp23017_hub
    address: 0x20

time:
  - platform: sntp
    id: esptime

image:
  - file: http://<YOUR_SERVER>/image.jpg
    id: remote_img
    resize: 825x1200

# ... Configure deep sleep settings you require.
#     I used this video as a starting point for configuring
#     automatic OTA updates and deep sleep:
#     https://www.youtube.com/watch?v=jfpaSAlecMk

# deep_sleep:

display:
- platform: inkplate6
  id: inkplate_display
  greyscale: false
  partial_updating: false
  update_interval: 30s
  model: inkplate_10 # Make sure to update this if you have an Inkplate 10!
  rotation: 270      # To make the screen display in our recipe portrait

# ... potentially other config as seen in the Inkplate esp home example
#     https://esphome.io/components/display/inkplate6.html#complete-inkplate-6-example

  # The colors here are "flipped" from what's intuitive, so the 'fill' is needed to clear the screen.
  lambda: |-
    it.fill(COLOR_ON);
    it.image(0, 0, id(remote_img), COLOR_OFF, COLOR_ON);
The tricky part is that now the image is embedded in the firmware. It’s easy to re-flash the firmware through Home Assistant’s UI, but I wanted the screen to be able to magically pull whatever recipe was on my mind. To do that, one can install the ‘Advanced SSH & Web Terminal’ Home Assistant add-on with ‘Protection Mode’ disabled (the community add-on, not the official one) and then set up a cron to run the following command in the esphome container.
Make sure to update the config (
esphome-web-xxxxxx.yaml) and host name (inkplate.local) to your values!
esphome run /config/esphome/esphome-web-xxxxxx.yaml --device inkplate.local --no-logs
As long as the device is connected to the network (not deep sleeping), this will re-flash whatever image is at /image.jpg on the server!
Inkplate Hardware
To wrap up, I printed the official 3D case provided by Inkplate and mounted it to the wall. I attached a LiPo battery I already had so that I could leave the device unplugged except when to charge!
Setting a recipe
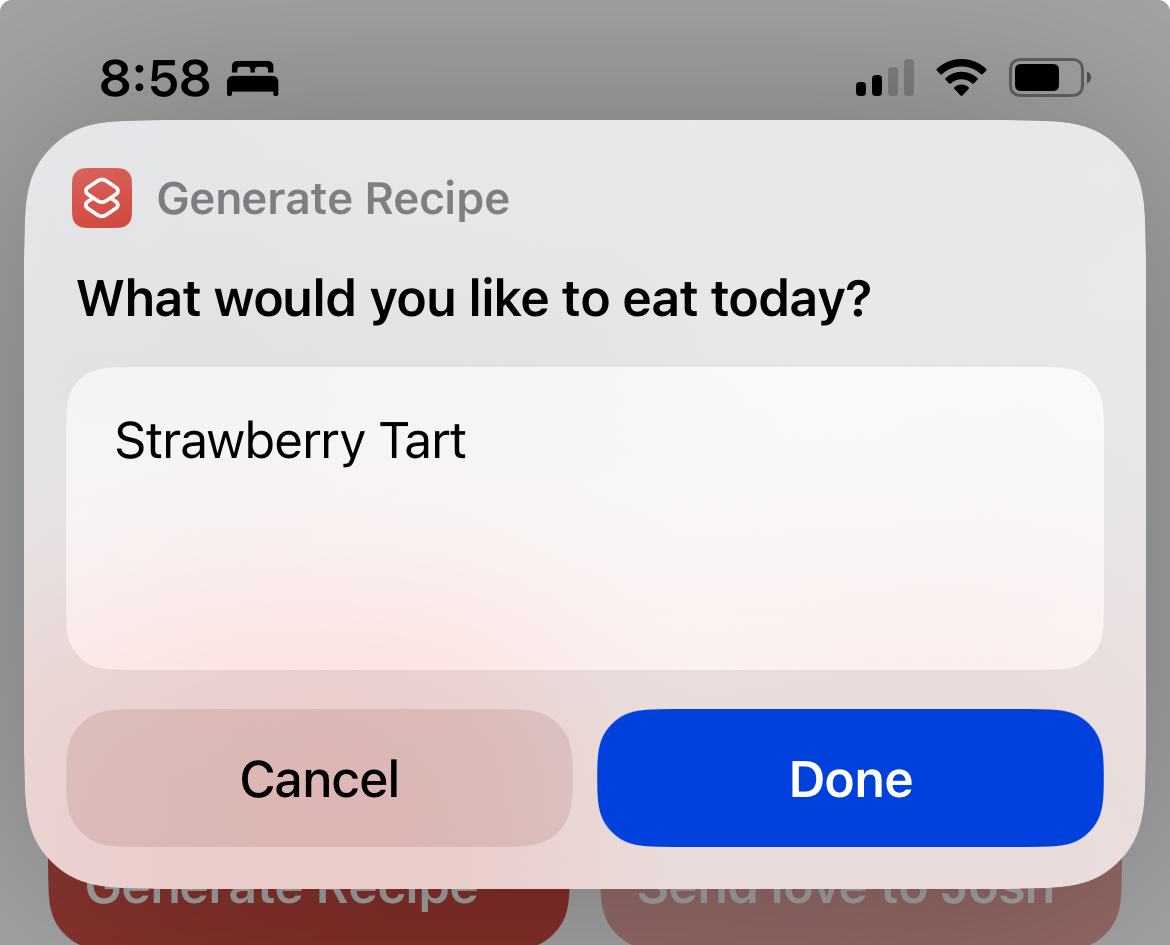
Once the server and Inkplate are set up, the cadence and means of updating the recipes is very flexible. What I did was set up a quick Siri Shortcut to trigger the container running on my local network. A couple times a day my Inkplate will wake up and re-flash itself to include any updates to /image.jpg.
With the Shortcut set up, I can even ask Siri instead of typing in the recipe!
I also set up a simple Telegram Bot to send me the ingredents list so I can pick them up when I go shopping!
Have a comment? Let me know
This post helpful? Buy me a coffee!